Our strap-line for plan2gether is “Church rotas made simple!”, however that does not mean plan2gether is lacking in features.
We have tried to keep the main features as simple and prominent as possible to make plan2gether easy to use. However, there are many advanced features if you dig a little deeper. They are not really hidden, but perhaps you didn’t know about them.
We hope that this article will help you to explore these features.
- Availability
- Using the ‘Reserve’ property
- Notifications per event
- Making a person a User
- Making the rota private
- Other features
Availability
This feature is found in the ‘People’ section.

Add your holiday dates or any dates you are unavailable and plan2gether will not add you to future rotas for these dates. A logged in user can add these dates for themselves, or an admin can add unavailable dates for any person.
If the person is already on the rota during these dates they will not be removed, but a red warning icon will indicate that the person is unavailable so the rota can be edited.
Select the person and click Add dates, then enter the date range that the person is not available.
For more details and a help video, see this article:
https://plan2gether.com/support/setting-availability/
Using the ‘Reserve’ property
This is found in the ‘Teams’ section.

You may want some of the team members to be excluded from the automatic rota creation, but to be available for manual swaps if required. This person can be made a ‘Reserve’ in the team or role.
In a single role team, simply check the box ‘Reserve’ against the person in the team.
In a multi role team there are specific roles team members fulfil, for example in a worship team there might be the roles of worship leader, keys, guitar, drums, bass.
To assign a reserve once the person is in a role, click on the role badge of the person or select the role. The list of people in that role will be listed and you can then check the ‘Reserve’ box for the person/people.
For more details, see this article:
https://plan2gether.com/support/teams/
Notifications per event
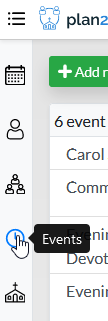
This is found in the ‘Events’ section.

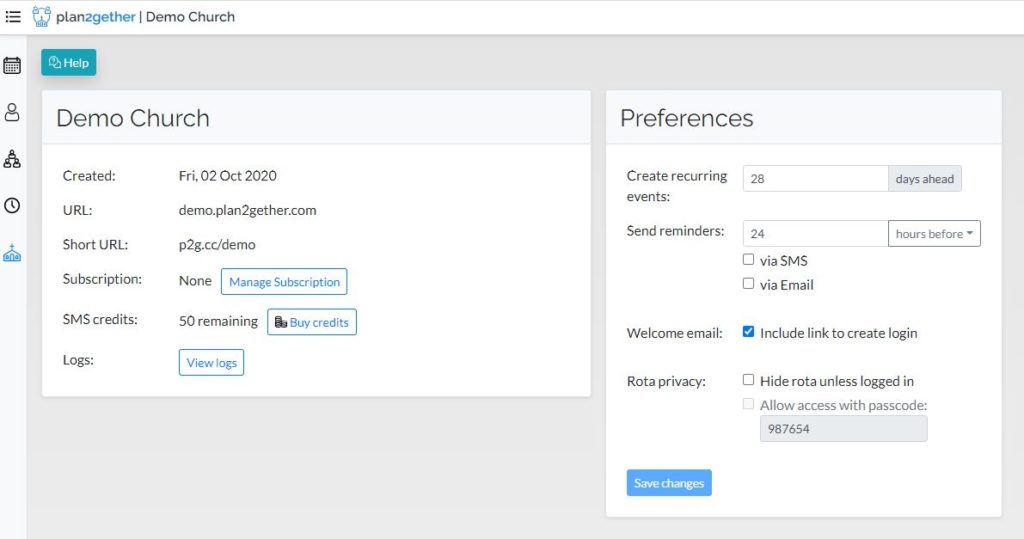
By default, notifications are sent to all people on the upcoming rota based on the settings in the Organisation section. This is where the notification time before events in days or hours is set.
Some events may require more notice than others, or perhaps notifications are not required at all for a particular event. This can be set in the events section by clicking ‘Edit’ on the selected event.
Edit the time in hours or days under ‘Send reminders’ and press Save. Alternatively, select ‘Don’t send’ in the drop down list. This can also be reset later to ‘Use organisation setting’.
For more details, see this article:
https://plan2gether.com/support/rota-reminders/
Making a person a User
This is found in the ‘People’ section.

In the Organisation preferences you can select whether you want the Welcome email to include a link to create a login. This must be checked to allow people to become logged in users of your organisation.
When you add your people by importing a CSV file then they can be sent a Welcome email.
The Welcome email can be sent to a person at any time by selecting them in the People section and clicking the button Send Welcome Email.
Provided the option to include the link has been checked in the Organisation preferences, the email will contain a link to create a login.
For more information, see this article:
https://plan2gether.com/support/welcome-email/
Making the rota private
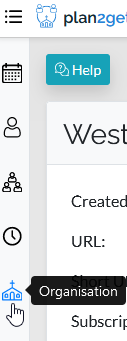
This is found in the ‘Organisation’ section.

By default the rota is public. No personal details are shown, only the person’s Display Name. Did you know that you can use the Display Name to anonymise a person?
If you want the rota to be completely hidden from the public you can set this in the Organisation preferences. You can block access to all but logged in users, or you can set a passcode that you can send to people who are allowed to view the rota without logging in. This passcode can be changed at any time, giving complete privacy if someone leaves your organisation.
For more details, see this article:
https://plan2gether.com/support/rota-privacy/

Other Features
Here are some more of the features in plan2gether:
- Free version to get you started – no Credit Card details required
- Single price plan with unlimited people, teams, roles, and events
- Import your existing database of people via CSV
- Anonymise people by setting a display name
- Three levels of access – administrator, team manager, user
- Non-logged in users view rotas with display names if no privacy setup
- Rota privacy – Only users can view rotas or require a passcode to view
- Users can set their availability
- Reserve team members – for use in “emergencies”
- Reminder notifications via SMS text message or email
- Unique URL for organisation and a short URL
- Recurring or non-recurring events
- Users can edit the rotas they are in
- Schedule reminder notifications globally or per event
- Attach notes to an event or team
- Printable rotas
- Mobile friendly display
- Rota conflicts highlighted
- Filter rotas by date, team or event
- Calendar or list view of rotas
- Extensive Support Centre with videos and articles
- Phone and email support
This support website contains help articles on all these features, but if you have any questions then please contact us
